

Fun for Kids: An Easter Craft Box
#ToddlerFunFriday,
Be Creative,
Crafts,
Crafts Kids,
Easter,
Kids,
Toddler
March 18, 2016
Bone-Shaped CHEESY Sticks - Guest Post (#ToddlerFunFriday)
#ToddlerFunFriday,
Guest Post,
Kids,
recipe,
Toddler
February 19, 2016

Today I have the lovely Claire from Girl on a Mission sharing a quick and easy cheesy stick recipe and to add a bit of fun, she is using a bone-shaped cookie cutter...Enjoy!
********
Do you have a toddler in your home who is obsessed with Pirates, Dinosaurs or Paw Patrol? If yes, then they will love these super cute bone-shaped cheesy sticks, and best of all, your toddler can help you make them. These sticks would also make a great 'trick or treat' snack for kids at Halloween, so be sure to PIN IT for later.
Let's get started...
Santa Handprints
#ToddlerFunFriday,
Be Creative,
Christmas,
Crafts Kids,
Family
December 4, 2015

We got our 'craft on' today at PlayCentre. Getting into the Christmas spirit, we made stars, baubles and my favourite - Santa Handprints with our babies & toddlers. These are super easy to do and look so cute! A great keepsake of your little one's handprint at such a special time of the year.
You will need:
Red paint
Skin tone paint
White paint
Brushes
Paper/Card
Pom poms
Googly eyes
Sharpie (optional to draw nose & mouth)
Here's what you do...
1. Paint the top half of your toddler's palm - RED

2. Paint the bottom half of your toddler's palm - SKIN TONE
(note: you can add a strip of white paint between the red and skin tone, to represent the rim of the Santa hat)
(note: you can add a strip of white paint between the red and skin tone, to represent the rim of the Santa hat)

3. Paint your toddler's fingers - WHITE

4. Press your toddler's hand on to paper or card, hold for 5-10 seconds, making sure your toddler's hand is flat. We found this awesome Christmas themed paper in our Resource cupboard. It made a great frame for our Santas'

5. Lift your toddler's hand carefully and get ready to decorate.

6. Decorate 'Santa'
Use pom poms for the hat, & googly eyes
Once the paint is dry, draw a nose & mouth (we still need to do this)
TIP: to make the pom pom stick to the paper better- cut a bit off the bottom (giving it a flat surface) then glue it down.

Here's a few more of our PlayCentre Santa Handprints - oh-so cute!

Have you made 'Santa Handprints' with your toddler?
Charlene
Linking up with
Made for Kids - The Resourceful Mama, Play Dough & Popsicles , Raising Little Superheroes , Books and Giggles
Also sharing with the Toddler Christmas Activity blog hopSUBSCRIBE TO OUR NEWSLETTER!
* INDICATES REQUIRED
First Name
*
Email Address
*
Select Your Email Option Below
Fun for Kids: A Christmas Craft Box
#ToddlerFunFriday,
Be Creative,
Christmas,
Family,
Kids
November 20, 2015

I love Christmas and especially crafts! Pinterest is very popular at this time of the year and is usually my go-to place for inspiration. Christmas craft ideas are coming left, right and centre at the moment - and sometimes can be quite overwhelming. I enjoy hands-on crafts, which include paper, stickers and general collage items. It gave me the idea of making a 'Christmas Craft Box' for my kids, especially my toddler - who absolutely loves doing collage.
You can spend a lot of money on craft supplies, especially when you buy the items individually. But thanks to good ol' K-Mart, they have made things a lot easier for us, by creating some awesome Christmas Craft Packs. It didn't take me long to have what I needed for our Christmas Craft Box, and it only took about 10 minutes to put it all together. Enjoy!
*This is NOT a Sponsored post. I purchased all the items myself and wanted to share them with you.

Supplies:
1. The Christmas Sticker Tub is great value at $6 (NZ$), which includes 45 x Adhesive foam stickers, 4 x Plain sticker rolls, 2 x Glitter sticker rolls and 2 x Holographic sticker rolls. I only put 4 rolls of stickers in our craft box to begin with and have kept the other four rolls as spare.
2. Bumper Xmas Craft Kit with 205 pieces of Craft Supplies - everything you need in one pack! Another great bargain at $6 (NZ$). Includes 100 pom poms, 3 bags of glitter, and 2 adhesive foam sheets. It also has 20 foam figure stickers (reindeer, Santa, Christmas tree, penguin etc), 30 googly eyes and 50 chenille sticks (pipe cleaners) in assorted colours.
3. Our supplies are all stored in a Sistema 7.9 litre container*, includes storage tray (perfect for keeping your supplies organised). In the bottom compartment, I have added some coloured paper (white paper has been added since photos were taken) and the pipe cleaners. *Purchased from The Warehouse (NZ)

I absolutely love our Christmas Craft Box and I can't wait to share it with the kids in the next week or so, as we get closer to Christmas!
Here are some more photos of our Christmas Craft Box, to hopefully inspire you to make your own for your family. Have fun!
Please note: Adult Supervision at ALL times. Small parts included (Choking Hazard)


Will you be making 'A Christmas Craft Box' for your family this year?
Charlene
Linking up with
Made for Kids - The Resourceful Mama, Play Dough & Popsicles , Raising Little Superheroes , Books and Giggles
#BlogFair - Mummy Do It
#IBOT - Essentially Jess
#BlogFair - Mummy Do It
#IBOT - Essentially Jess
PLAY IDEA: Marble Playdough
#ToddlerFunFriday,
Be Creative,
Kids,
Play,
PLAY IDEA,
Sensory Play
November 13, 2015

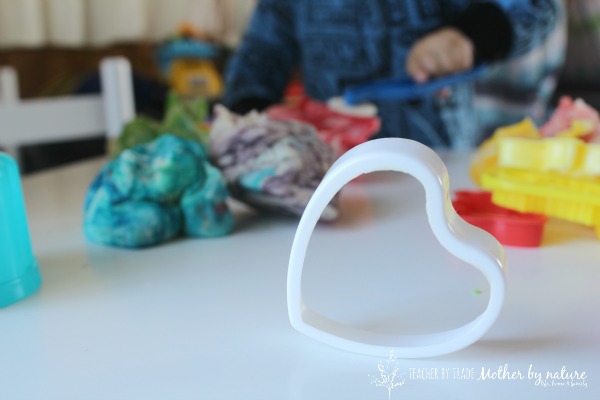
My daughter, Miss B loves playing with her little brother and she asked if we could make some playdough. I love playdough, it's so easy to make and most of the time, we have all the ingredients sitting in our pantry. We use a basic playdough recipe, that I also use at Playcentre.
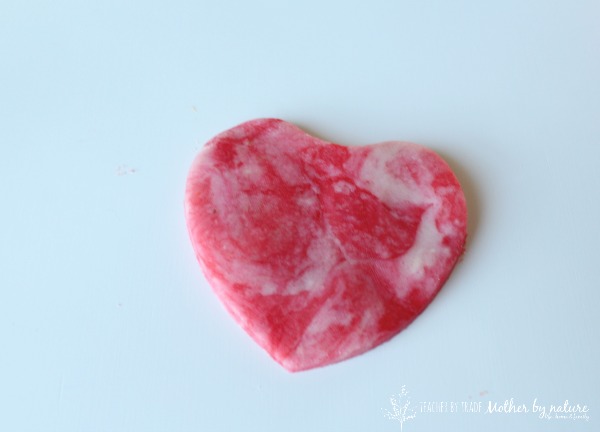
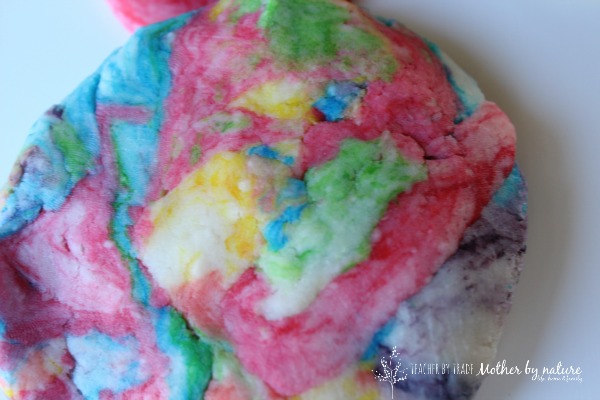
Miss B told me "Mum - the easiest way to colour the playdough is to make a hole (well) in the middle of the playdough, add the food colouring and then 'smush' it together in a plastic bag". This is what we got...MARBLE PLAYDOUGH!

Miss B was actually surprised it came out with a marble effect - this wasn't what she thought, but in her mind, it was SO MUCH BETTER. And off she went to show her little brother, who thought it was pretty cool too.

BASIC PLAYDOUGH RECIPE
Ingredients:
3 cups flour
1 1/2 cups salt
6 tsps Cream of tartar
2 Tbsps Cooking Oil
3 cups Boiling Water
Method:
Mix the dry ingredients and cooking oil together, then add boiling water. If working with groups of children, divide quantities amongst the bowls. Stir well until the mixture leaves the sides of the bowl. Add more flour if the mixture seems to sticky, then turn out and knead.
GLUTEN FREE PLAYDOUGH
Ingredients
1 cup Rice flour
1 cup Maize Cornflour
1 cup Salt
4 tsps Cream of tartar
2 tsps Vegetable oil
2 cups Hot Water
Method:
Combine all ingredients together in a pot and cook over a low heat stirring as you go until the mixture leaves the sides of the pot and reaches a dough like consistency. Turn out and knead.
(Recipe credit: Recipes for Messy Play)

Playdough cannot be ‘done wrong’ and is a satisfying sensory experience for young children.
Playdough is easy to mould and manipulate therefore helping children to develop hand, eye, arm and body coordination. They are also developing their finger and hand muscles through squeezing, patting, rolling, poking and pinching. They (the children) can break it into small pieces, roll, cut and make shapes out of it.
Add tools for cutting, pressing and shape-making e.g. cookie cutters, twigs, straws, pipe cleaners, and shells. Cups, bowls and pots & pans will encourage 'home play' and you can add props such as animals, rocks, dinosaurs to encourage dramatic play.
Do you have any fun playdough activities?
Please share your ideas below
Linking up with
PLAY IDEA: Soap Flake Foam
#ToddlerFunFriday,
Be Creative,
featured,
Kids,
PLAY IDEA,
Sensory Play
November 6, 2015

Soap Flake Foam* is a super easy, sensory activity your toddler will love, especially if they are a fan of messy play. Messy play gives children the opportunity to experience a wide range of sensory experiences. Activities like Soapy Sand and Finger paint help children learn about different textures and materials and now we can add Soap Flake Foam* to the list.
This recipe is from "Recipes for Messy Play".
Ingredients:
1-2 cups Soap Flakes
Hot Water
Powder paint (or tempera paint)
Method:
Put 1-2 cups of soap flakes into a bowl and add hot water until the soap flakes are completely covered and the water is just above their level in the bowl. Beat the mixture until the soap flakes dissolve and the mixture has the consistency of canned shaving foam.
Let the MESSY PLAY begin!

The foam is cloud-like, soft and squishy to touch and is a great sensory activity on its own. If you are wanting to brighten it up for your toddler, you can add a bit of tempera paint or powder paint (see this home-made powder paint recipe) and encourage them to mix the two together - this is where the fun really begins.


We (adults) can support our children by role modeling and showing them it’s okay to get messy. We can use descriptive words such as soft, slimy, squishy and encouraging them to tell stories about what they are feeling/doing.

The great thing about this Soap Flake Foam and messy play, in general, is you don't need a lot of extra equipment. Encourage your toddler to experiment by using their hands and fingers, feet and bodies. You can introduce other materials later on, like brushes, cardboard, sticks, leaves etc.

This is such a fun activity, even my 10 year old daughter enjoyed playing with it. Supervision is a MUST with any type of play, especially messy. Safety consideration: the soap flakes may irritate if it gets into the eyes, so remember to have some fresh warm water and towels on hand.
Are you ready to get messy with Soap Flake Foam?
Linking up with
10+ Fun Halloween Ideas for Toddlers
#ToddlerFunFriday,
Be Creative,
Crafts,
DIY,
Halloween,
Kids,
Toddler
October 30, 2015

Today I am sharing a round up of 10+ Fun Halloween Ideas for Toddlers I have seen on Pinterest and circulating around the blog-o-sphere this past week. But first I wanted to share some of the creations my son brought home this week from home-based childcare.
PLAY IDEA: Painting With Toddlers
#ToddlerFunFriday,
Be Creative,
Kids,
Play,
PLAY IDEA,
Sensory Play
October 16, 2015

Painting is a great play activity for children of all ages. It is a way for children to be creative using different colours and textures of paint and to showcase their feelings through art. It is important for us (parents) to support and let our children paint their own way. Here are some ideas, tips and tricks for you to consider when "Painting With Toddlers"

There are so many benefits to painting, especially with toddlers. It helps children to develop hand, eye, arm and body coordination, also developing their finger and hand muscles. Children are able to experiment with colour and texture, and using this to express themselves.
We (parents) can support our children by talking to them about their art work, naming and dating their work, display it proudly in our homes, and provide opportunities to paint on different surfaces, including their hands.


You can either set up a painting area on a table or if you have one, an easel. Put some non-toxic paint (or make your own) in some small containers, add paper and your toddler is good to go! Have an apron, paint smock or an old t-shirt available for your tot to wear over his or her clothes, because this activity can get quite messy, very quickly, especially in the hands of toddlers.

Using an old egg carton as a paint tray is such a brilliant idea, because your toddler doesn't need a lot of paint, it's easily accessible, and clean up will be a breeze - once your little one has finished their 'masterpiece', pop the tray in a plastic bag and throw it in the rubbish.

Here are some ideas you might like to try, with your toddler, the next time you explore painting...
- Try using different textures in a range of sizes and colours e.g. paper, cardboard, fabric, wallpaper to paint on. Also other surfaces such as fences, stones and wood off cuts might interest your child.
- Use a range of paints such as powder, puffy, poster, acrylic, watercolour, dye, oil paints or natural products such as watered down clay.
- Have a range of bright clean colours and shades to choose from
- Use different painting tools such as brushes, sponges, rollers, leaves, cotton balls, fly swats
Does your toddler love to paint? Do you have any ideas, tips and tricks about 'Painting With Toddlers' that might help others? Leave a comment below.
Charlene
 |
| Painting at an easel |

More PLAY IDEAS:
PLAY IDEA: Colour Sorting (with ball-pit balls)
#ToddlerFunFriday,
Be Creative,
DIY,
Kids,
PLAY IDEA
October 9, 2015

In case you missed it, last week I shared 7 Fun Ways to Play with Ball-pit Balls on the blog. There are some really fun and inexpensive ideas, so be sure to check them out. But first, I wanted to share my own 'Colour Sorting Box' I made for my son, inspired by this post. Here's a little tutorial of how you can make one of these Colour Sorting Boxes for your toddler. Enjoy!
Subscribe to:
Posts (Atom)


