

We are heading into Winter here in New Zealand, however my blogging friends and followers on the other side of the globe, are counting down to their Summer holidays (LUCKY!), so this week for Tuesday Ten, the prompt is Summer Bucket Lists. Today, I am going to (hopefully) inspire my overseas friends with some fun and creative "Bucket List Display Ideas". (and I am totally sharing this, so I can do the same in 6 months time, when it's our Summer). The thing I love about displays is: you put it in a place where your whole family can see it and refer to it daily, as opposed to writing a list in your notebook...closing that notebook and probably not looking at the list until 3 days before the kids go back to school (*guilty*).
So....
Here are 10+ ways you can display your Summer Bucket Lists in your home! Click on the images for more details.
1. Write your ideas on wooden pegs and peg them on the rim. Once you have completed the task, pop the peg in the bucket. Extra activity - get your children to decorate the bucket.

2. Hang some mini buckets and fill them with items relevant to the task/idea.

3. Who said you need a 'bucket'? Grab a small jar and write your ideas on popsicle sticks. Pull out an activity every day.

4. Make your own buckets using card or scrapbook paper.

5. These mini envelopes are cute and would look very cool displayed in your home.

6. Grab some colouring pens and draw/write your own Bucket List OR get your children (if they are older) to design one for the family.

Image Credit: via
7. A frame, chicken wire, pegs, pieces of card & a bucket. Simple, yet effective.

Image Credit: via
8. Hanging your bucket list on the lounge/kitchen door where everyone can see it is a great idea. Once completed, put the task in the envelope.

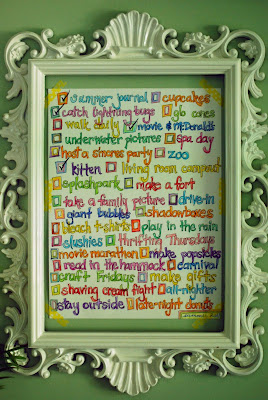
9. FRAME IT! Write your list, with a tick box next to each idea. Tape it on the wall and put a frame around it.
10. Similar to #3 idea. Use different coloured popsicle sticks to categorise your activities...click image to see lots of great ideas.

Ooh and as a bonus... my very own! I created this School Holiday Ideas Jar - perfect for keeping young ones entertained.

How are you going to display your 'Summer' bucket list in your home?

Follow Me


