KONMARI WITH KIDS: PAPER-Part 2 School Memorabilia


Welcome to my new series: 'KonMari With Kids'. 

If you have just joined me - WELCOME - I recently completed the KonMari method with my OWN belongings, read 'My KonMari Journey' to see how I did. Now, it's time to get stuck into my kid's stuff - I have two children: Miss B, 12 years old and Master M, 3 years old.
Previously on the blog, I shared how I KonMari'd my kids clothes (Baby, Toddler and Tween), their books. and their Art Work.  If you have been following my blog for a while, then you will know PAPER was a HUGE category for me, and going through the kids paper is going to be a bit of a mission - there is a lot of paper to get through.

For the benefit of this series and the category of PAPER - I have broken it into two parts: KIDS ARTWORK and SCHOOL MEMORABILIA. Some of you will probably be thinking that they should really be in the Sentimental category, and I do agree - Kids Artwork and School Memorabilia are very sentimental, however - it's paper and it needs to be dealt with, sooner rather than later - otherwise it will forever be in the 'too hard' basket. Am I right? So are you with me? Let's Do This!


*******

- KONMARI WITH KIDS -


Marie suggests children as young as three years old can decide what gives them joy and the key principle is that each person should be making the decisions for themselves. Before you tackle your kids items, she does recommend you KonMari your own belongings first.

In a nutshell, Marie Kondo has four rules she recommends people follow when doing the KonMari Method:

1. Tidy in one shot, as quickly and completely as possible
2. Sort by category, not by location
3. Selection Criterion: Does it 'spark joy?'
4. Order of tidying: Clothes, Books, Documents (Paper), Miscellaneous items (Komono), and Mementos (Sentimental)


*******


Today I am sharing: PAPER: School Memorabilia. 


Just like my own KonMari journey when it comes to Paper, I have been putting this category off for quite a while, only because I wasn’t ready to face to the mountain of PAPER there is for ‘School Memorabilia’. I have pretty much kept everything since my daughter started school in 2010, and yes that is including her school books. Well, up until last year I did still have my own Intermediate books stored away in boxes. Eek! However, I got through mine, now it is time to go through my daughters! It's time to sort, purge and organise her school memorabilia once and for all. 

Last year I searched 'how to organise School Memorabilia' and found this post by Karen (A House Full of Sunshine) who shared her amazing School Memory Bank on iHeart Organizing. Everything about this post sparked joy and I knew this was the system I have been looking for to organise my daughter's school memorabilia. 

Supplies: (this is what I bought to create School Memorabilia boxes for my two children)
The Warehouse (NZ)

KMart (NZ)

Warehouse Stationery (NZ)
- Kookie Clear file folders (Purple & Green) x 15 of each colour 

Note: I bought these when they were on Clearance for $1 each. (One for each year: Year 1 - Year 13 in NZ, 1 x A4 Art and 1 x spare folder.)


Total cost: $115.50* (for two children) 
*Please note: these items were all purchased at different times, mostly when on Special (Buy 1, Get 1 1/2 price) or on Clearance. Sistema products are available at others stores, so it pays to shop around. 

*******

Before I begin, I have to share that I am absolutely devastated because somehow, somewhere I have misplaced a whole year of Miss B's school memorabilia – including her End of Year report, Yearbook and school books. I have no idea where it is. I know it’s not in my home because I have gone through everything – I even checked the kid’s sentimental boxes. Nothing. It MAY be at my parents place, but I highly doubt it, because I brought everything I had up there back to our place when I started my KonMari journey. It breaks my heart that I don’t have it, but I do have a few things from that year, like her school photo, mid-year report and some writing/art, so it’s not too bad. But still...

This wouldn’t have happened if I had a system in place for her school papers – everything was kind of just chucked into different boxes, especially after moving a few times during her primary school years. Now, I am even more determined to get all of my daughter’s school papers in order and use the same system for my son, who will be starting school in a couple of years. 

So if you have your kids school memorabilia in various places scattered around your home or 'chucked' in a box...then this post is for YOU!

BEFORE 


I gathered all of Miss B's school papers and books into the lounge and started to sort them by year (2010 – 2017). It was at this point I realised I had no books from 2011 *sad face*. I am still hopeful that they turn up. Fingers crossed.


I had piles of paper everywhere and I wasn’t sure if I would get through it all. Once I had the papers sorted by year, I started the purging process with Miss B. 

Note: It's important to include your children in this process because at the end of the day, it belongs to them and one day they will get it all back. 

From each year I want to keep the following:  
  1. Class Photo
  2. School Report
  3. Awards/Certificates
  4. Writing
  5. Artwork
With this in mind, we (my daughter and I) started the purging. We flipped though all of her books and miscellaneous pieces of paper, only keeping things that sparked joy. Miss B was actually quite ruthless, so it made the process a little less overwhelming because at the end of the day – all of this going to be hers, so it’s important she had a say in what she wanted to keep and what she wanted to discard. 


We did this for all the other years and started to see a nice snap shot of each school year. I trimmed some of the papers so they would fit in the clear file folder. 

I loved reading my daughter's stories from when she was five, in fact, I kept more than what I intended, but that’s okay because they all spark joy. Just seeing her growth in those early years was amazing to see and read (from a Mum & teacher point of view).


DISCARD PILE

I have been holding on to these books for 7 years. Today we pulled out our favourite pieces, Miss B and I thanked them (we really did) and then discarded them. No longer taking up valuable space in our home. 

DURING

Once we had the piles of paper Miss B wanted to keep, it was time to put them in the clear file folders. I put a post-it note with the Year level and Year on it so I didn't mix them up. Inspired by Karen's cover pages (which are amazing!),  I decided to quickly make my own, in black & white. (If you would like a copy, feel free to contact me). 

The cover page is simply showing the Year level and room to write the actual year e.g. 2010, 2011 etc. Once I go through the kids photos, I might change the front cover to include the individual school photo, but for now I like the simplicity of the cover pages. 

I proceeded to file Miss B's 'papers' into the clear files* in this order: 
  1. Cover page (YEAR ___)
  2. Class photo
  3. School report
  4. Awards 
  5. Writing (several pieces of her writing and other subject areas if they sparked joy for her)
  6. Art Work (a few pieces of her favourite art work from each year) - See how I organise Kids Art Work
* Each clear file has 20 pockets - however the spine can be removed easily, so you can add more clear file pockets if you need to. 


AFTER

DONE! SEVEN YEARS of 'School Memorabilia' in ONE PLACE! As I mentioned at the beginning of this post - I decided to use the same system for my son, who is currently 3. It's nice to know it is ready for him when he does start school and I won't be losing any of my kids school work again. (still hoping it turns up)
As you can see, on the spine I have written the Year level on the left hand side and the Year on the right, using a chalkboard pen. I got a bit emotional when I realised my daughter will graduate from High School in 2021 and my son will graduate in 2031! 
I must say it is a great feeling knowing that each folder shows us a snapshot of the kids time at school. I actually wish I did this for myself before I purged it all - well I did keep my favourites. 

The thing I love most about these Sistema Storage Organisers (40L) is that there is room at the bottom of the container for my kids' Early Childcare Education (ECE) folders (Home-Based Childcare and Playcentre folders), and also their YearBooks. My daughter has a 100 pocket from her ECE years (1-5 years old) and I will be getting the same for my son. He currently has 2 x A4 Clear file folders and 3 scrapbooks for Playcentre - so they will all go in this one container. Win Win! 


Thanks for reading,
Charlene

How do you store/organise your kids' School Memorabilia? 


The storage organisers are stackable, and are tucked away and stored like this in my wardrobe. 


Coming Up Next: KonMari With Kids: KOMONO - TOYS
It's the one you have been waiting for!! TOYS!! I can't wait to share my Before, During and After photos with you.


I am super excited about this new series 'KonMari With Kids' and would love for you to follow along in this process, better yet, join me - Subscribe to my Blog, so you don't miss a post and together we CAN 'KonMari With Kids'. I will also be sharing my journey on my Facebook page, and Instagram, so be sure to follow me there too.


Don't Miss A Post...Subscribe Today
* indicates required


Select Your Email Option Below


1

KONMARI WITH KIDS: PAPER-Part 1 Kids Artwork


Welcome to my new series: 'KonMari With Kids'. 

If you have just joined me - WELCOME - I recently completed the KonMari method with my OWN belongings, read 'My KonMari Journey' to see how I did. Now, it's time to get stuck into my kid's stuff - I have two children: Miss B, 12 years old and Master M, 3 years old.

Previously on the blog,  I shared how I KonMari'd my kids clothes (Baby, Toddler and Tween) and their books. Now I am ready to tackle the PAPER. If you have been following my blog for a while, then you will know PAPER was a HUGE category for me, and going through the kids paper is going to be a bit of a mission - there is a lot of paper to get through. So for the benefit of this series and the category of PAPER - I will be breaking it into two parts: KIDS ARTWORK and SCHOOL MEMORABILIA. Some of you will probably be thinking that they should really be in the Sentimental category, and I do agree - Kids Artwork and School Memorabilia are very sentimental, however - it's paper and it needs to be dealt with, sooner rather than later - otherwise it will forever be in the 'too hard' basket. Am I right? So are you with me? Let's Do This!

*******

- KONMARI WITH KIDS -

Marie suggests children as young as three years old can decide what gives them joy and the key principle is that each person should be making the decisions for themselves. Before you tackle your kids items, she does recommend you KonMari your own belongings first.

In a nutshell, Marie Kondo has four rules she recommends people follow when doing the KonMari Method:

1. Tidy in one shot, as quickly and completely as possible
2. Sort by category, not by location
3. Selection Criterion: Does it 'spark joy?'
4. Order of tidying: Clothes, Books, Documents (Paper), Miscellaneous items (Komono), and Mementos (Sentimental)

*******

Today I am sharing: PAPER: KIDS ARTWORK


Over the years I have been swimming in what feels like a pool of artwork. My kids love doing art - painting, collage, cut and paste, colouring...plus much more. For many years,  I have held onto almost every piece of artwork my daughter (now 12) has done. I had them stored in boxes and DIY art folders, and now, FINALLY, I am going to go through the lot and sort them into piles of KEEP & DISCARD. 

My son is 3 and already has a collection, so I really need to get it sorted once and for all, only keeping the pieces that spark joy to me and my kids (most importantly, my kids) - because one day, everything we decide to keep, will eventually be returned to them. 

In Marie Kondo's second book, Spark Joy,  she briefly talks about the various ways of approaching your children's creations. For example: "taking a photo of your children's art before throwing it away" or "deciding how many [pieces] you will keep and sticking to that number". 

She goes on to say "if there are items you cannot bring yourself to part with now, there is no need to force yourself to discard them". Simply take care of them. Dedicate a spot in your home to display the art so everyone can enjoy them. "Once you have enjoyed the works to the full, you can thank them for helping your child grow and discard them guilt-free". 

Reading this definitely helped take the pressure off and it inspired me to start the process. 

BEFORE 

Before I started, I gathered up all of the kids artwork and put them in the living room where I was going to sort them. I spent a little while just staring at the volume of the artwork I had collected and kept over the years - carting it all from house to house. (My daughter and I moved a couple of times in her first 7 years). 

It was daunting but alas I started...
My plan was to sort everything into sub-categories first - KIDS + YEARS and then get stuck into the purging.


I started with the most recent items, which were stored in a 'My Art Portfolio', that I purchased from KMart earlier last year. One portfolio contained a few items from my daughters last year of primary and the other was full of artwork from my son - a combination of Playcentre art and art he did at home-based care.

I pulled everything out, and made a pile for my son and a pile for my daughter. I continued working through the boxes and started adding items to the two piles. They got bigger and bigger and I wasn't sure if I could actually go through with this.


DURING

Once I had all of the kids artwork out of the boxes and portfolios, I began putting them into piles according to the year they were completed. I blitzed through my son's as it was only 2 years worth of art - there was quite a lot, nonetheless. I discarded any artwork that wasn't named or dated, especially if it only had a few strokes of paint on - I had several of these that were named and dated, so the excess was definitely not going to be missed. 

Master M saw his 'plate art' and picked it up. His face lit up, so I immediately took a photo. He was very proud of his 'plate art', so I knew it was a keeper and even though I took this photo, I have actually kept the plate in his keepsakes box too.  


Moving along...I had the same process for my daughters artwork - 11 years worth. It was like taking a trip down memory lane, looking back at art she did when she first started school. During the initial purge, we (my daughter and I), discarded anything that was not dated, unless it was something she created at school and wanted to keep, if this happened we would think about who her teacher was at the time and pin point the year that way. (Alternatively, you could look back at their Year books). I put the year on the back of each piece of artwork, just in case they got muddled up. 

At this moment in time, you could not see my living room floor - there was art EVERYWHERE, however it was organised chaos - and the piles were starting to grow. 


Once I had the art in piles, according to year (from 2006-2017) we started from the oldest pile (2006) and picked out the favourites, the items that sparked joy for me and my daughter. As we were going through each year, the piles got smaller and smaller. Miss B loved looking back at her art, some sparked joy, some made her laugh out loud because she couldn't believe she created it and others were a definite NO. There were a few pieces we had to negotiate over, but that's okay - it's all apart of the process. 


SOME OF OUR FAVOURITE PIECES

DISCARD PILE

The process from start to finish probably took less than two hours to complete.  The great thing about the KonMari method, is that you only have to do it once! Now I can put my new systems in place and keep on top of the art clutter. 

I am pretty proud of what we discarded, we thanked the art for helping the kids grow and put it in the rubbish/recycling.  After 11 years of holding on to it, I was glad to see it go, no longer taking up space in my home. 


AFTER

And THIS is what we are left with! This is our current system. 

Each child has: 1 x A3 clear file folder (for larger pieces of artwork); 1 x A4 clear file folder  (for up to A4 sized artwork) and 'My Art Portfolio' (which holds the current artwork from care and playcentre).


WHERE TO FROM HERE...

Before the art goes into the clear file folders, it is put on display in the playroom (pegged up on a string), for a couple of weeks. When new art comes in, the older pieces are placed into the 'My Art Portfolio', and at the end of the term, we select our favourite pieces and add these to the clear file folders, and discard the others. 

For my son, some of his art is pasted into his Playcentre portfolio or slipped in the back of his home-based child care portfolio. I also add a few items from my daughter's art collection into her school memorabilia folders (more on that another day). 

Speaking of my daughter's art folders - they are nearly full, well it does have 10-11 years worth of artwork in them. I am currently looking at my options of what to do next. I recently heard about Jimmy Halfpenny, an Australian company who collects your kids artwork and turns it into a photobook, similar to ArtKive (USA). Leanne from Organising The Four of Us shared a timeline video about her experience with Jimmy Halfpenny and it got me really excited. I will keep you posted if I do choose this option. (Check out their Facebook page)

I have also looked at Project Life (using the Project Life App) & ChatBooks (using Instagram or Facebook) - which are both great ideas. Oh the decisions!

If you ARE wanting to take photos of your kids artwork, be sure to check out Becky Higgin's Tips for Photographing Children's Artwork.

There are so many ways we can store and organise our kids artwork - do what works for YOUR family. However, the first thing I recommend you do is cull and choose your favourites.

Thanks for reading,
Charlene

Are you feeling overwhelmed by your Kids Artwork? 
How do you currently store/organise your kids artwork? 


*******

Coming Up Next: KonMari With Kids: PAPER - School Memorabilia

Sorting through all of the school memorabilia sounds like a big task, and it probably will be - however I know it's going to be worth it. Watch this space.


I am super excited about this new series 'KonMari With Kids' and would love for you to follow along in this process, better yet, join me - Subscribe to my Blog, so you don't miss a post and together we CAN 'KonMari With Kids'. I will also be sharing my journey on my Facebook page, and Instagram, so be sure to follow me there too.


Don't Miss A Post...Subscribe Today
* indicates required


Select Your Email Option Below


2

KONMARI WITH KIDS: SENTIMENTAL - KEEPSAKES


Welcome to my new series: 'KonMari With Kids'. 
If you have just joined me - WELCOME - I recently completed the KonMari method with my OWN belongings, read 'My KonMari Journey' to see how I did. Now, it's time to get stuck into my kid's stuff - I have two children: Miss B, 12 years old and Master M, 3 years old.

Previously on the blog, I shared how I KonMari'd my kids clothes (Baby, Toddler and Tween), their books., Paper - including Art Work and School Memorabilia, TOYS, DVDs, Crafts, Stationery & Bedroom decor, and now it's time for Sentimental.

Marie suggests children as young as three years old can decide what gives them joy and the key principle is that each person should be making the decisions for themselves. Before you tackle your kids items, she does recommend you KonMari your own belongings first.

For Sentimental, I am going to follow the principles she (Marie Kondo) suggested for tidying Komono:
  1. Gather all items in that category in one place. 
  2. Choose only those that spark joy 
  3. Store by category.

*******

Today I am sharing: Sentimental Keepsakes

I have shared in my previous KonMari posts that I am a sentimental hoarder. My partner tells me I always make connections to something - which is true. When I see or touch items from my past I am instantly taken back to that moment in time. So when it came to going through my kids sentimental keepsakes, I knew it was going to be a big job, mentally and emotionally. I had to think about the end result - How much stuff am I willing to keep and part with? Is it going to fit in the containers I have? 

Recently, I decided that this was it. I was mentally and emotionally prepared to go through the kids sentimental keepsakes. So I pulled the containers into the lounge and started going through it all. Here is my journey...

BEFORE 

These containers have been staring at me for weeks and it was finally time to pull them all out and go through it all, once and for all. 

Over the years I have been purging items from Miss B's keepsake containers, however I haven't touched Master M's so I'm not entirely sure what I have actually put in there. Eep! (Note: I will be doing Photos in a separate post).

TIP: If you have a lot of sentimental keepsakes: make sub-categories e.g cards, decor, sentimental toys, pregnancy etc. Breaking it into smaller categories will make it less daunting. This way you get to see what you have in that sub-category, making the purging process a bit easier. 


DURING

At this point you couldn't see the floor of my lounge. There were piles of stuff everywhere. I was slowly making head way with the kids sentimental keepsakes and some of the items I had stored away for safe keeping, didn't actually spark joy so I added them to my 'donate pile'. 

Choosing items that truly spark joy has become easier over time, and I am grateful for the KonMari method - I don't think I would be able to pare down as much as I have, if I hadn't used the method. 

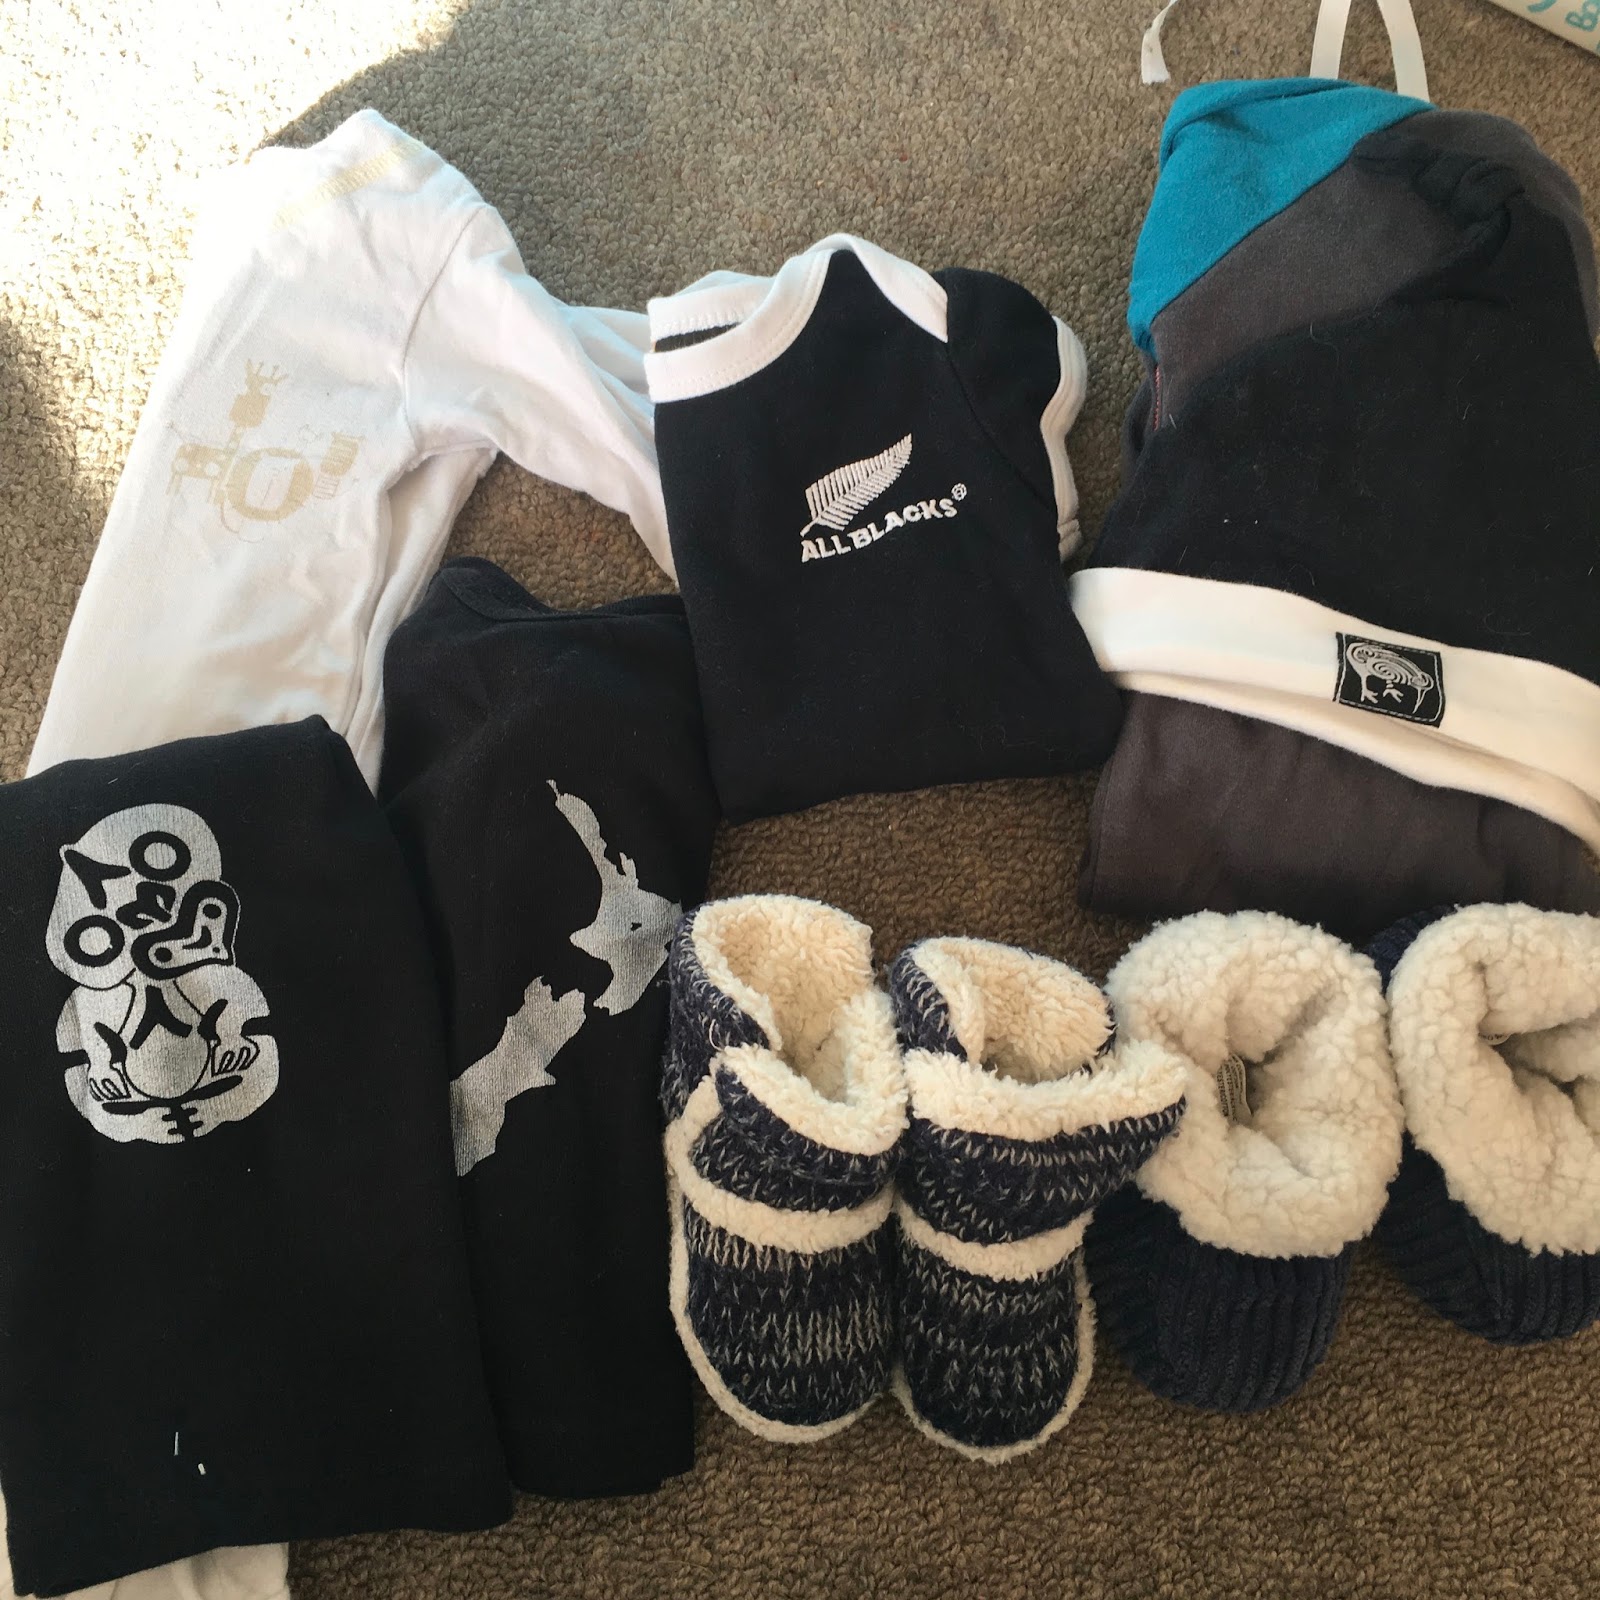
Special items of clothing were also added to the kids keepsake boxes - these are the items that remind me of when they were newborn or frequently wore - these are the all time favourite pieces - they bring a lot of joy. 


Blankets, sheets, wraps etc - there were a lot! So I kept a couple of our favourites and have donated the rest. 


 AFTER 

A few years ago I set up a 27L keepsake box for each of the kids - it was filled with items from their First Year, including their baby books. However as they have grown older, I wanted to add special mementos to the box, but the boxes became too small. So I upgraded to a 60L container each (I just used what I had) and now EVERYTHING can be found in one place. 


Before I put the 'First Year' keepsakes into the 60L container, I took a photo of what I actually decided to keep for each child.

Master M's includes special towel from Great Nana, booties, a few giraffe items (that was his theme), footprint art, teddy, pregnancy journal and cards from his birthdays etc.


Miss B's keepsake box includes: pregnancy journal, capsule of special items from the day she was born, art from a close friend, pillow she made, and a few soft teddies from her childhood. (see below for what's in the box).


In the Paris box, Miss B has her special treasures. These treasures are also special to me too, as they remind me of the first seven years that it was just us. (If you didn't know, I was a single mum before meeting my partner (and Master M's Dad).


GREETING CARDS
My son loves all of his cards, based on the covers, so I can't argue with that joy, so I have decided to keep all the kids cards and I am okay with that, so are they.

At the moment I have all the cards organised by year and wrapped in a rubber band. I have thought about turning the cards into a book, using binder rings, however I'm not 100% sure. When I decide, I will definitely let you know. For now, this system works for me (I have done the same with my own cards).
*** TIP ***
If you ARE purging any cards, cut the fronts off and donate them to your local PlayCentre, Childcare centre or hospital (Kids Ward) as they are can be repurposed for crafts.

DONATE PILE

I was amazed at how quickly my donate bin filled up. Some of the items I am going to try and sell, and the rest will be donated. 


*******

It's a great feeling going from three 'overflowing' containers each child to ONE. I am very proud of my efforts, and there is still room in the containers to add more special keepsakes over the years, as my children grow. When I look at the contents in boxes, I see a snapshot of my children's lives (12 years and 3 years) and that SPARKS so much JOY for me. Now I can put them back in the wardrobe and not have to worry about containers falling on me when I open the door.

Each of my children have: 
1 x A3 & 1 x A4 Art Folder
1 x 40L School Memorabilia
1 x 60L Sentimental Keepsakes 
and that is what they will be given when they leave home (but that's not for ages!!). 

Next step: to find containers matching their School Memorabilia colours (purple and green), I did find the perfect container online, however when I contacted the company, they no longer sell them and shouldn't be on the website. I was bummed. Fingers crossed I find something suitable, in the meantime, the containers I have will have to do.

I hope you found this post helpful. If you did, please feel free to PIN and/or SHARE with your friends and family.

Thanks for reading, 
Charlene

Coming Up Next: KonMari With Kids: Sentimental - Photos 
Saving the best (and hardest) till last - {PHOTOS}. Join me as I tackle the (lack of) printed photos I have of my children, and make a new plan moving forward. 

I am super excited about this new series 'KonMari With Kids' and would love for you to follow along in this process, better yet, join me - Subscribe to my Blog, so you don't miss a post and together we CAN 'KonMari With Kids'. I will also be sharing my journey on my Facebook page, and Instagram, so be sure to follow me there too.


Don't Miss A Post...Subscribe Today
* indicates required


Select Your Email Option Below


0

KonMari With Kids: Sentimental - Photos


Welcome to my new series: 'KonMari With Kids'. 
If you have just joined me - WELCOME - I completed the KonMari method with my OWN belongings last year,  you can read 'My KonMari Journey' to see how I did. Now, it's time to get stuck into my kid's stuff - I have two children: Miss B, 12 years old and Master M, 3 years old.

Previously on the blog, I shared how I KonMari'd my kids clothes (Baby, Toddler and Tween), their books, Paper - including Art Work and School Memorabilia, TOYS, DVDs, Crafts, Stationery & Bedroom decor, Sentimental Keepsakes, and now it's time for the last sub-category: PHOTOS.

Marie suggests children as young as three years old can decide what gives them joy and the key principle is that each person should be making the decisions for themselves. Before you tackle your kids items, she does recommend you KonMari your own belongings first.

I am going to follow the principles she (Marie Kondo) suggested for tidying Sentimental...
  1. Gather all items in that category in one place. 
  2. Choose only those that spark joy 
  3. Store by category.

*******

Today I am sharing: Sentimental Photos

I am so happy to be finally sharing with you, the final subcategory of Sentimental. It's been a full on couple of months, and I haven't had a chance to blog until now! A few weeks ago I pulled out the 60L container of Kids photo albums and printed photos into the lounge and got stuck in. Note: I completed this task over two days, simply because it was huge task, there were A LOT of photos to get through. Here's what happened.

DAY ONE

BEFORE
In this container, I had albums, printed photos, photos in frames, scrapbooks and a few other random photos. During my 'KonMari With Kids' series, if I found any photos, I would put them in this container. It filled up pretty quickly. 


I took everything out and started to corral like things together and separated piles for each of my children (aged 12 and 3).  This didn't take long at all.

What happened next was the most time consuming part...

Marie mentions in her book, Spark Joy, "the basic rule is to remove all photos from their albums...but you don't need to do this for any albums that spark joy as a whole" - unfortunately for me, none of the albums sparked joy, they were old, torn (well-loved) and sun-faded. So I started removing ALL the photos from the albums, and I even found a few old school Kodak photo envelopes with photos in. 

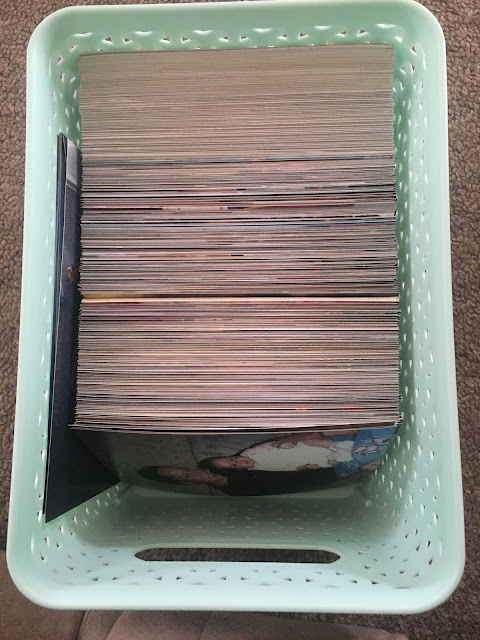
I noticed I must have printed almost every single photo of my daughter when she was born, as I had two x 200 leaf albums FULL of just her first 2 months! and one album from 3 months to a year, then there were random printed photos from throughout the years. My son doesn't have many printed photos, so his photos didn't take as long.


Frames and albums emptied and ready to be donated.


DURING

Once I had removed ALL the photos from the albums, I was left with hundreds, possibly thousands of printed photos...now it was time to start the purging process - only selecting photos that spark joy. 

At this stage, I had to stop...I was so overwhelmed with the amount of photos, I decided to stop and start the purging process another day...looking back, I am really glad I did, because I wasn't 100% ready, and that is totally understandable.

I believe it is really important for you to be ready and committed when tackling such a huge task/category. You need to be in the right head space, and for me, I wasn't. Take the time to re-evaluate your KonMari goals and what your vision is. This really helped me! 


*******

DAY TWO 

After a couple of days, I returned to the photos. I had them temporarily stored in these small rattan baskets. The black box/folder is in fact an album with Photo CDs...I will be doing these separately, as it's a part of my next project, I have yet to decide if I will blog about it...watch this space. 

The rattan basket on the left are photos of my daughter (12 years old) and the one of the right are photos of my son (3 years old) - half of those are actually photos of my daughter EEK! The photos in the white basket (top right) are the kids 10th birthday and 1st birthday Photo bunting...these will be put in their keepsake boxes. The pile of photos behind them are our family photos and have been moved to my Photo box.


I started going through my daughters photos, corralling like photos together, and found in amongst them were family photos, my personal photos (e.g. friends weddings that we both attended etc) and a few of my son, which were added to his pile. I was happy to find all of my daughter's school photos - now I can add these to her School Memorabilia folders. 


AFTER
Now it may not look like much of a difference but I did purge over a third of my daughter's photos (remember she had a basket and a half worth of photos). I think when I start putting them into albums, I will probably find myself purging some more, and that is all part of reaching the 'click point' of what sparks joy and what I am happy with. I can't wait to get started. 


My daughter's photos on the left and my son's on the right


DISCARD PILE

Photos & albums that no longer spark joy were discarded straight away. 

FINAL WORDS

This is my temporary storage solution for my kids photos...each child has a rattan basket with their printed photos, their birthday bunting will go into their keepsake boxes, as well as my daughter's scrapbook. The photos in the zip lock back (pictured bottom left) are larger family photos and these will be stored with the rest of our family photos (See My KonMari Journey - Photos). 

It is such a relief to have all the kids photos in ONE PLACE and not in random albums that don't spark joy. Now they are ready to be organised and displayed. 


NEXT STEPS... MOVING FORWARD

Now that I have completed the 'purging/discarding' part of Sentimental Kids Photos, I have been thinking about how I want to organise and store them, so that everyone gets to view the joy sparking photos. 

Before I began this sub-category, I asked my daughter (in regards to photos of her)..."In 10 years time, what would prefer to look at...printed photos (in albums) or a photo book?" and she replied "printed photos"...this made me so happy because I do love printed photos and in 10 years time, who knows, the way things are evolving, there might not be printed photos, so we will treasure them until that happens. 

"My goal is to put all the printed photos I currently have into
 'joy sparking' albums and add to them as my kids grow older"

My next goal, well an ongoing goal, is to get photos of the kids printed and put into their albums and get them up to date...SnapFish currently offer FREE 50 x 6x4 prints each month, so I am going to take advantage of that, and when I can I will print more photos. It's an investment for my children, and I know they will appreciate looking back at all these photos in years to come. I will also do the same for my personal photos and my partners, so we will all have 1-2 albums each. 

I think for our family photos - I will create 'Yearly photo books' dating back to 2014, when we became a family of four. I already have 2013 printed, so that's a start, right? There are so many options out there at the moment, and it can be quite overwhelming, however, now I have a vision of what I want for my family, I am determined to get my photos off my devices and into books (whether they are printed albums or photo books. 

I am excited about my next project,  it's a big one, one that won't happen overnight so watch this space.

******

And that my friends, brings us to the end of my 'KonMari With Kids' series...I hope you have enjoyed reading about our journey, and that it has inspired you to give the Konmari method a go for yourself. 
If you have any questions, please don't hesitate to contact me, I am more than happy to help. 

Thanks for reading, 
Charlene


Don't Miss A Post...Subscribe Today
* indicates required


Select Your Email Option Below


2
Back to Top